This tutorial is part of a series of tutorials that will use the same scene and progressively build on previous tutorials. So remember to save the scene you created in this tutorial as it will be used later.
We will do all tutorials in Unity Free edition because that is what most people are using.
Our system allows you to easily add A.I. to any 3D model. To show you what we mean, we’re going to be adding A.I. to a basic cube.
In this tutorial, you will learn:
- How to enable A.I. on any object
STEP 1: Install PlayMaker into a blank project, then import our assets.
STEP 2: Create a blank scene. Save it as something like “tutorial scene” (this scene will be used in later tutorials)
STEP 3: Create a plane. Name it “Ground”. Mark it as STATIC on the top right corner.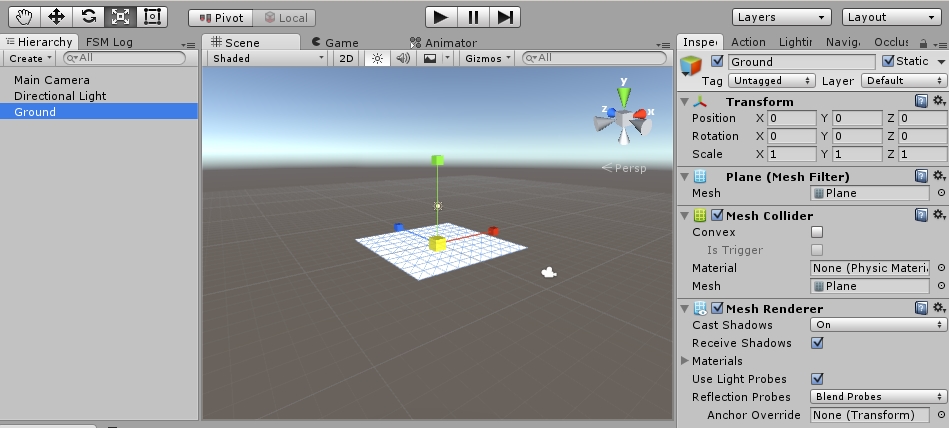
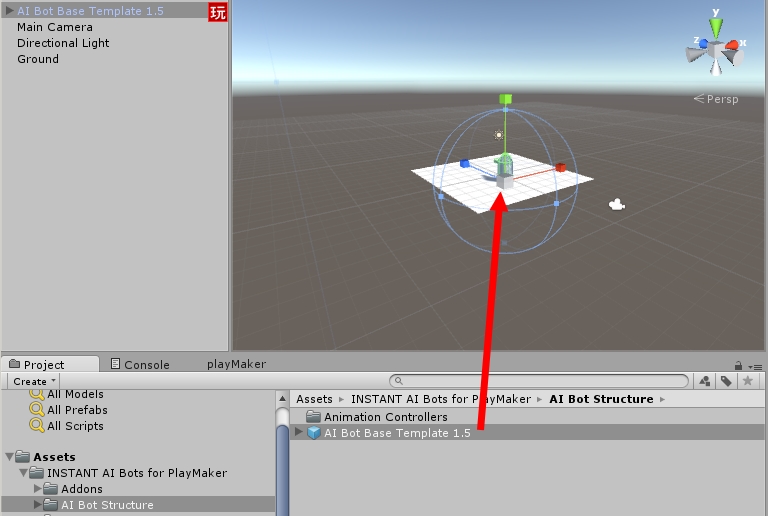
STEP 4: Drag our A.I. prefab onto the plane. (folder: /AI Bot Structure/) This prefab contains all the FSMs and scripts necessary for A.I. functionality.
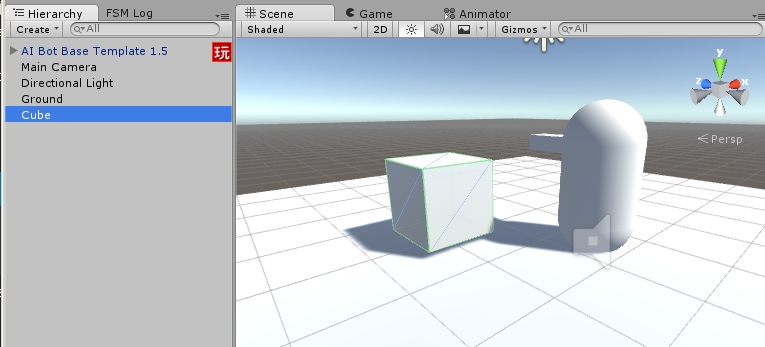
STEP 5: Now we will add a simple 3D model for the AI. Drag a cube into the scene. We are going to add A.I. to this cube.
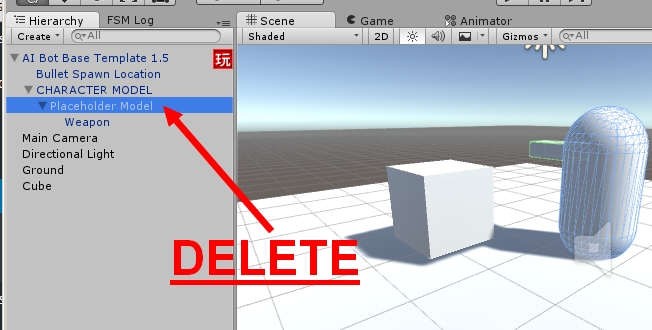
STEP 6: Go back to your A.I. prefab, and delete the original placeholder model:
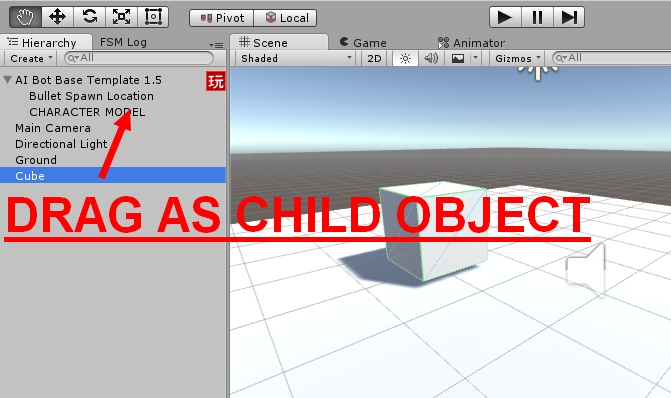
STEP 7: Now, make the cube model a child of the AI prefab. Drag the cube under the CHARACTER MODEL section.
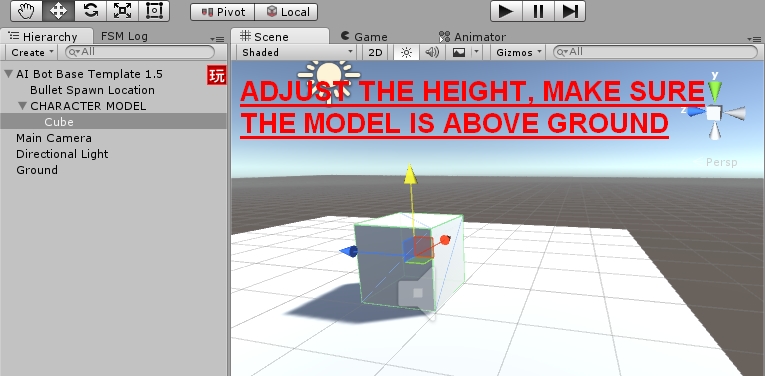
STEP 8-A: Set the cube’s local position to 0,0,0, so it aligns up with the AI prefab’s position.
STEP 8-B: Sometimes setting the Y to 0 puts the model underground or in an undesirable place. You have to manually tweak the position so it’s above ground. Later on when we add humanoid models, make sure the feet are on the ground, not overlapping.
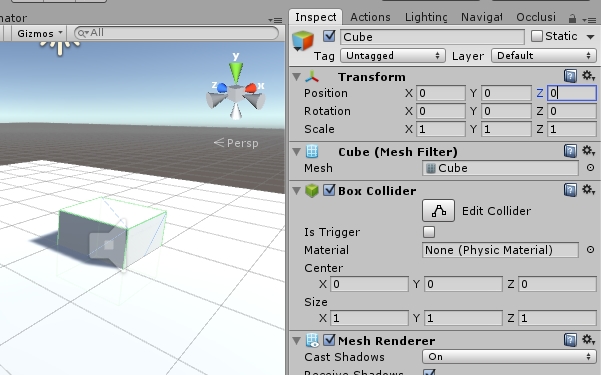
STEP 9: IMPORTANT! REMOVE ALL COLLIDERS FROM YOUR 3D MODEL. DO NOT REMOVE ANY COLLIDERS FROM THE AI PREFAB ITSELF. If you don’t do this, it will confuse the bullets and mess with line of sight from other bots. Also, make sure this 3D model is untagged. You must only use the bare 3D model, with nothing else added to it.

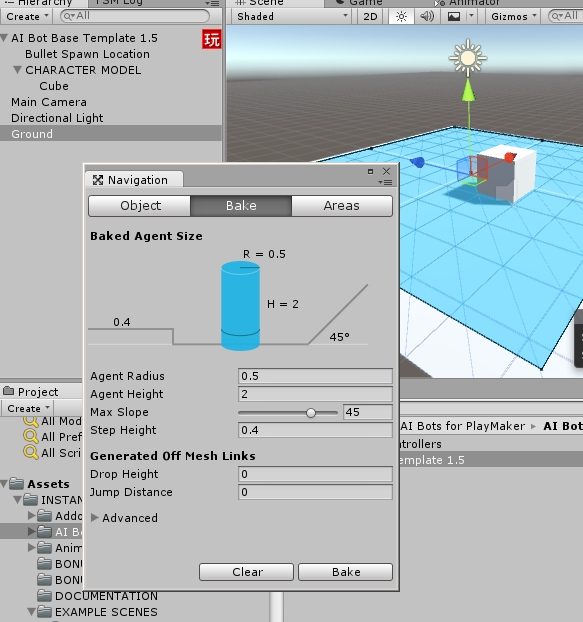
STEP 10: This cube is now AI enabled! However, there is one last thing to do before it’s operational. You must bake the NavMesh in the scene so the AI can do proper pathfinding. So, open up Unity’s Navigation window. Make sure the GROUND object is set to Navigation Static. Now click BAKE. If things went right, the ground will turn blue. If you want to learn more about NavMesh baking, please see Unity ‘s documentation. Please note: If you don’t bake the NavMesh before playing, or if an existing NavMesh is removed, the scene will throw hundreds of strange errors.
STEP 11: YOU’RE DONE!. You can play the scene. If there are no errors, then you did everything right. The bot shouldn’t be doing anything at this point, since there are no enemies in the scene, and we didn’t tell it to follow waypoints.
In the next tutorial, we will add waypoints to the bot and tell it to move around.
Save your scene because we will use it again in the next tutorial.