We will be expanding on the previous tutorial and add an enemy to the scene for the bot to fight with.
In this tutorial you will learn:
- How to add a bot to the opposite team
- How to change a bot’s team
- How to change tell a bot the enemy team
- Watch the bots fight each other
v. 1.6 UPDATE: We now support multiple teams! In the Awareness FSM, there are now 3 enemy tag slots:
charSTAT_EnemyTag, charSTAT_EnemyTag2, charSTAT_EnemyTag3
These allow your AI to have a maximum of 3 enemy teams, 4 teams total on the map.
STEP 1: For purposes of our demo, let’s make a copy of the previous bot to make the setup process faster.
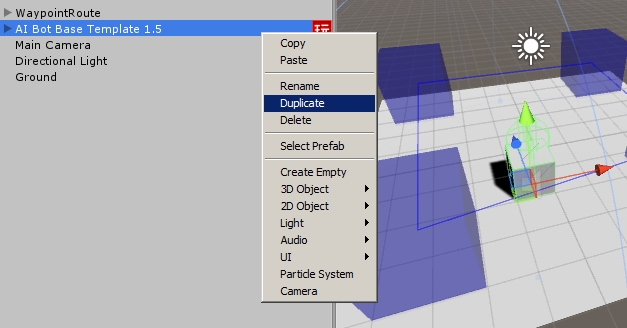
STEP 2: Rename the new bot to “Enemy” (can be any name), and drag his position away from the first bot. For the remainder of this tutorial, we will refer to the 2nd bot as “enemy bot”

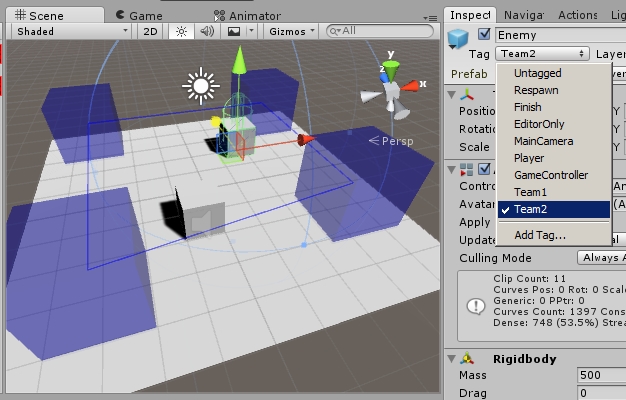
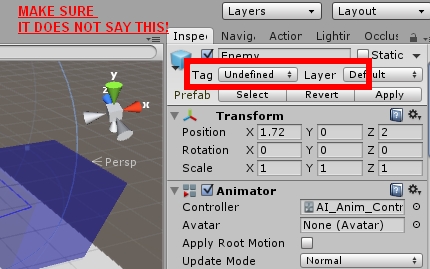
STEP 3: Set the enemy bot’s tag to “Team2″ (again, can be anything).
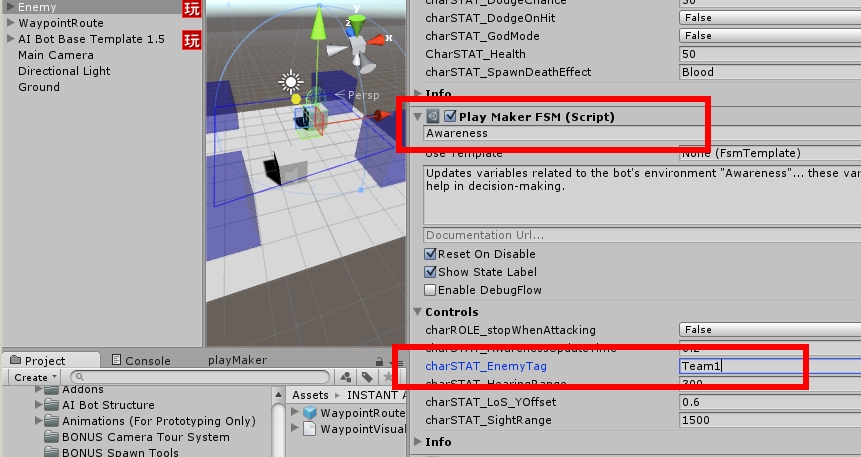
STEP 4: We have to tell the enemy bot to attack a specific team tag. So go into the enemy bot’s Awareness FSM. Find the FSM variable, “charSTAT_EnemyTag” and set it to “Team1″ (which is the team tag of the first bot)
Note: Make sure you don’t have any “Undefined” in your tag list! If you do, there will be tons of strange errors. For our demo, make sure your project as “Team1″ and “Team2″ and “Building” tags!
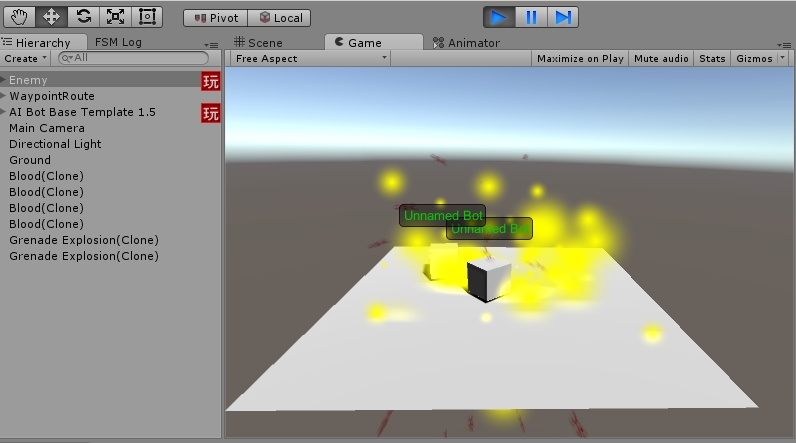
STEP 5: You’re done! Now play the scene. If you did it right, the bots should now fight each other. Again, if there are NavMesh errors, you must bake the NavMesh before playing. You might be wondering how to set up weapons and damage points. Don’t worry, we will talk about the weapon system in another tutorial. For now, let’s finish the basic tutorials first.