WARNING: DO NOT PLAY THE INCLUDED UFPS DEMO SCENE YET! It will throw errors. You must set up a few things first, so please read this tutorial. The reason you have to manually set up a few things is because we cannot include UFPS code/files in our package for legal reasons.
This tutorial will tell you everything you need to know on setting up UFPS with our A.I. Note: This will *sound* complicated, but it really isn’t. We have done the hard work for you, so setting this up should only take about 10 minutes. You do *not* need programming experience to do this. There is a small step of adding code, but since we did it for you, you just have to copy and paste it!
SUMMARY: Basically, we left the UFPS source code untouched, except for one script where we add a small function. We added a Health FSM to the UFPS player prefab. We also added 2 FSMs to the UFPS bullet prefab (all other code is untouched). So you will need to load your UFPS guns with the new bullet prefab.
This fast tutorial teaches you to:
- Connect UFPS to PlayMaker
- Set up UFPS human player health with PlayMaker
- Connect UFPS damage to our A.I. system
- Connect our A.I. damage to UFPS health system
Time to Complete: About 10 Minutes
STEP 1: Install UFPS into your project. Install PlayMaker. Before you do anything else, these 2 must be installed first, or Unity will throw tons of errors! Also, make sure to install the newest PlayMaker version BEFORE installing our product. Some users have reported that some PlayMaker updates can cause Unity to disconnect the FSM scripts, causing you to manually add FSMs to everything. Integration also uses the UFPS PlayMaker Actions provided for free on the PlayMaker website (we have included the free download already in our package)
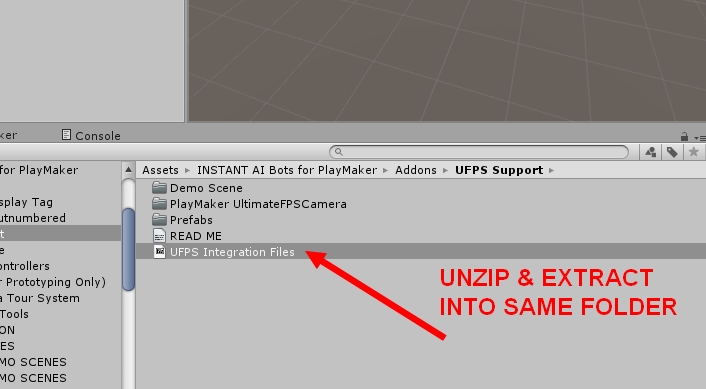
Step 2: Install our product. Then go to /Addons/UFPS Support/ and extract the ZIP file “UFPS Integration Files” into that folder.
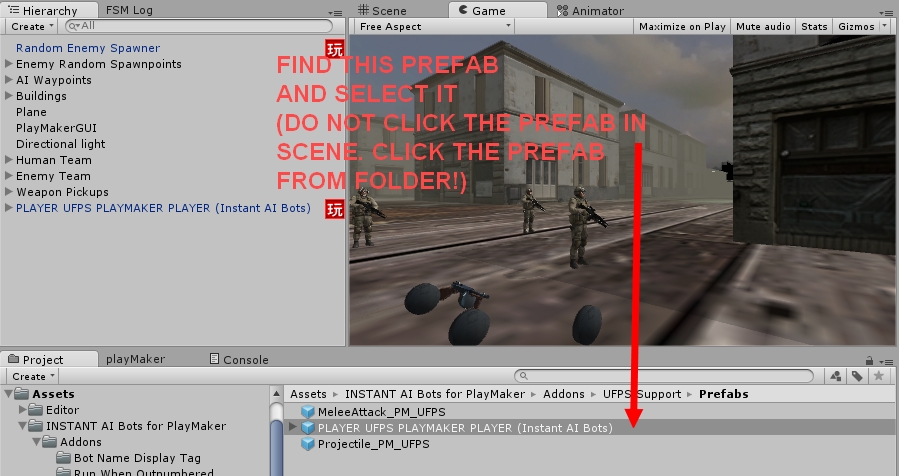
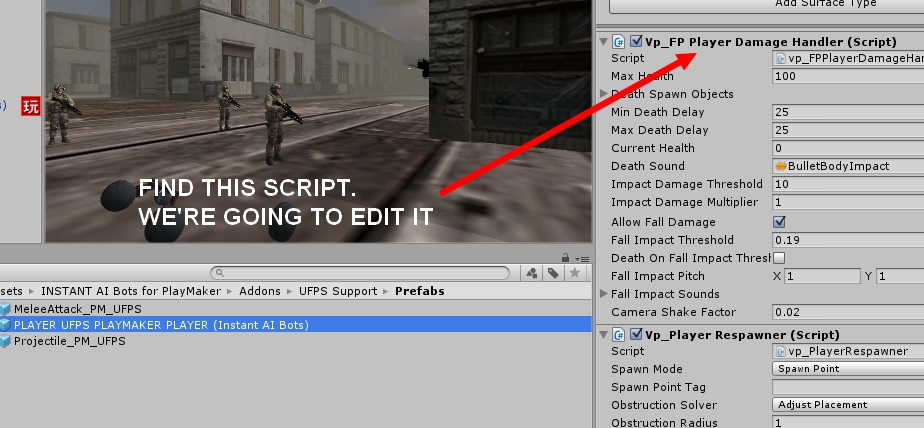
STEP 3: Add a small function to the UFPS Player Damage Handler script. Don’t worry, this is the only programming we’ll be doing. Go to /Addons/UFPS Support/Prefabs/, and click the “PLAYER UFPS PLAYMAKER PLAYER” prefab. This is basically the same UFPS player prefab. Find the script shown in the screenshot and edit the script. Go on to next step to find the code.
STEP 4: Inside that script, find the following function. We will insert some code below that function (not inside it).
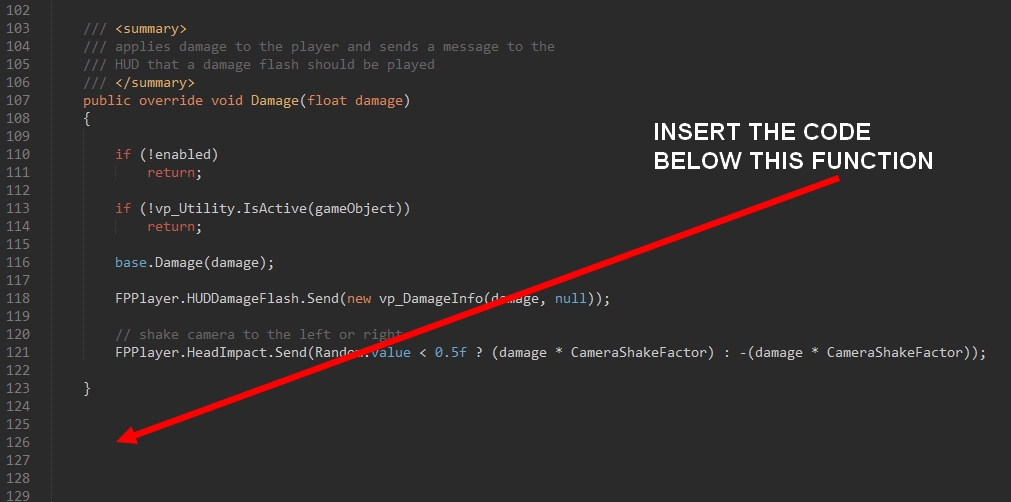
Now, copy and paste the following code BELOW that function:
// START COPYING =================================
public void PlayMakerDamage(float damage)
{if (!enabled)
return;if (!vp_Utility.IsActive(gameObject))
return;base.Damage(damage);
FPPlayer.HUDDamageFlash.Send(new vp_DamageInfo(damage, null));
// shake camera to the left or right
FPPlayer.HeadImpact.Send(Random.value < 0.5f ? (damage * CameraShakeFactor) : -(damage * CameraShakeFactor));}
// STOP COPYING HERE ================================
So your screen should look like this:
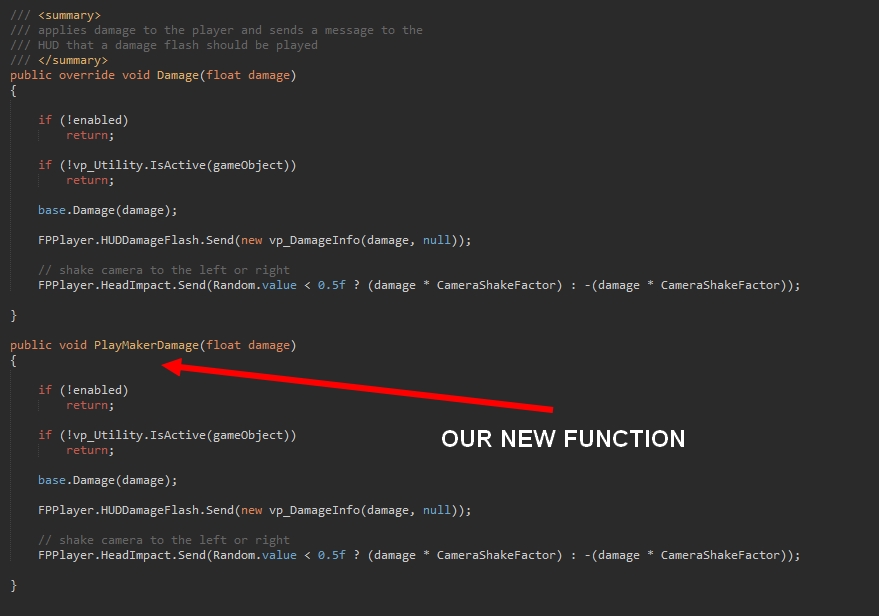
Remember, the function name must not be changed, and must remain as “PlayMakerDamage”…this is because we added a Health FSM to the UFPS player prefab, and the Health FSM needs to call the function by name “PlayMakerDamage()” to create UFPS damage effects.
STEP 5: Now, go back to the “PLAYER UFPS PLAYMAKER PLAYER” prefab and find the Health FSM at the bottom. Edit the FSM in PlayMaker…

STEP 6: We’re simply going to verify that the function we just added, “PlayMakerDamage” is filled into the slot inside the FSM. So, inside the FSM, find the following state: “External Tools UFPS Health Sync” and the event “Send Damage to UFPS”
This should already be done for you, but just in case — verify that your screen looks like this:

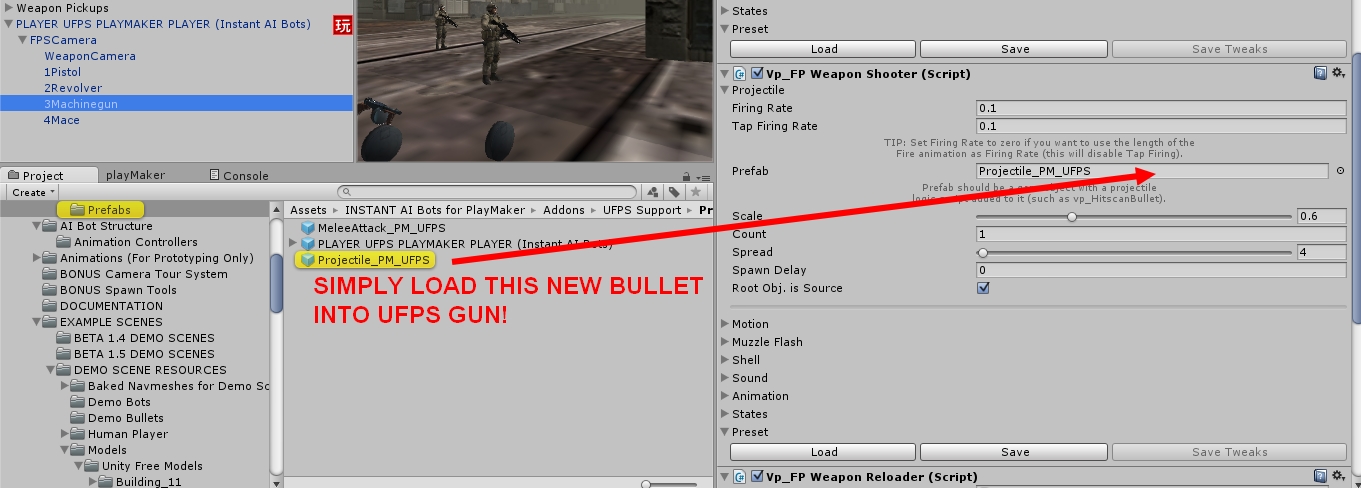
STEP 7: EDITING WEAPONS: Inside the “Addons/UFPS Support/Prefabs/” folder, find the prefab “Projectile_PM_UFPS”. This is basically the standard bullet prefab that comes with UFPS, but with 2 FSMs added to it. No scripts were changed.

If you want to make your own UFPS bullets: Simply create the bullets as required by UFPS. Then copy these 2 FSMs into that bullet to make a new bullet prefab. Your guns should use the new bullet prefab.
(Note, for the demo scene, you don’t have to set any of this up. Everything is already done for you. This is only for your future use, in case you want to do some custom modifications and want to know how everything works)
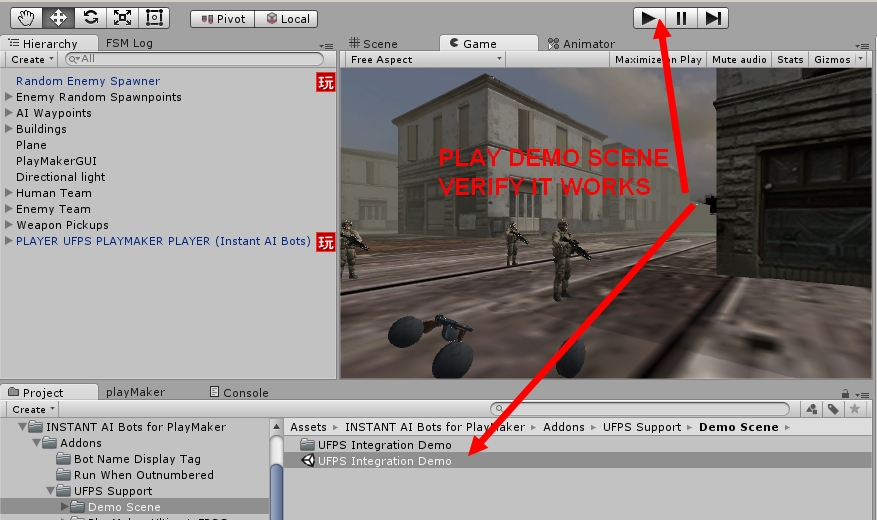
STEP 8: Play the demo scene. If you did everything right, the scene should play, you should see your teammates moving, and enemy robots should cause damage to you. NavMesh errors: Remember to bake the NavMesh if you see these errors.